Creating My Own REST API.
Using .NET Core, Render, and JS.
Updated: 13:01-25/11/2025
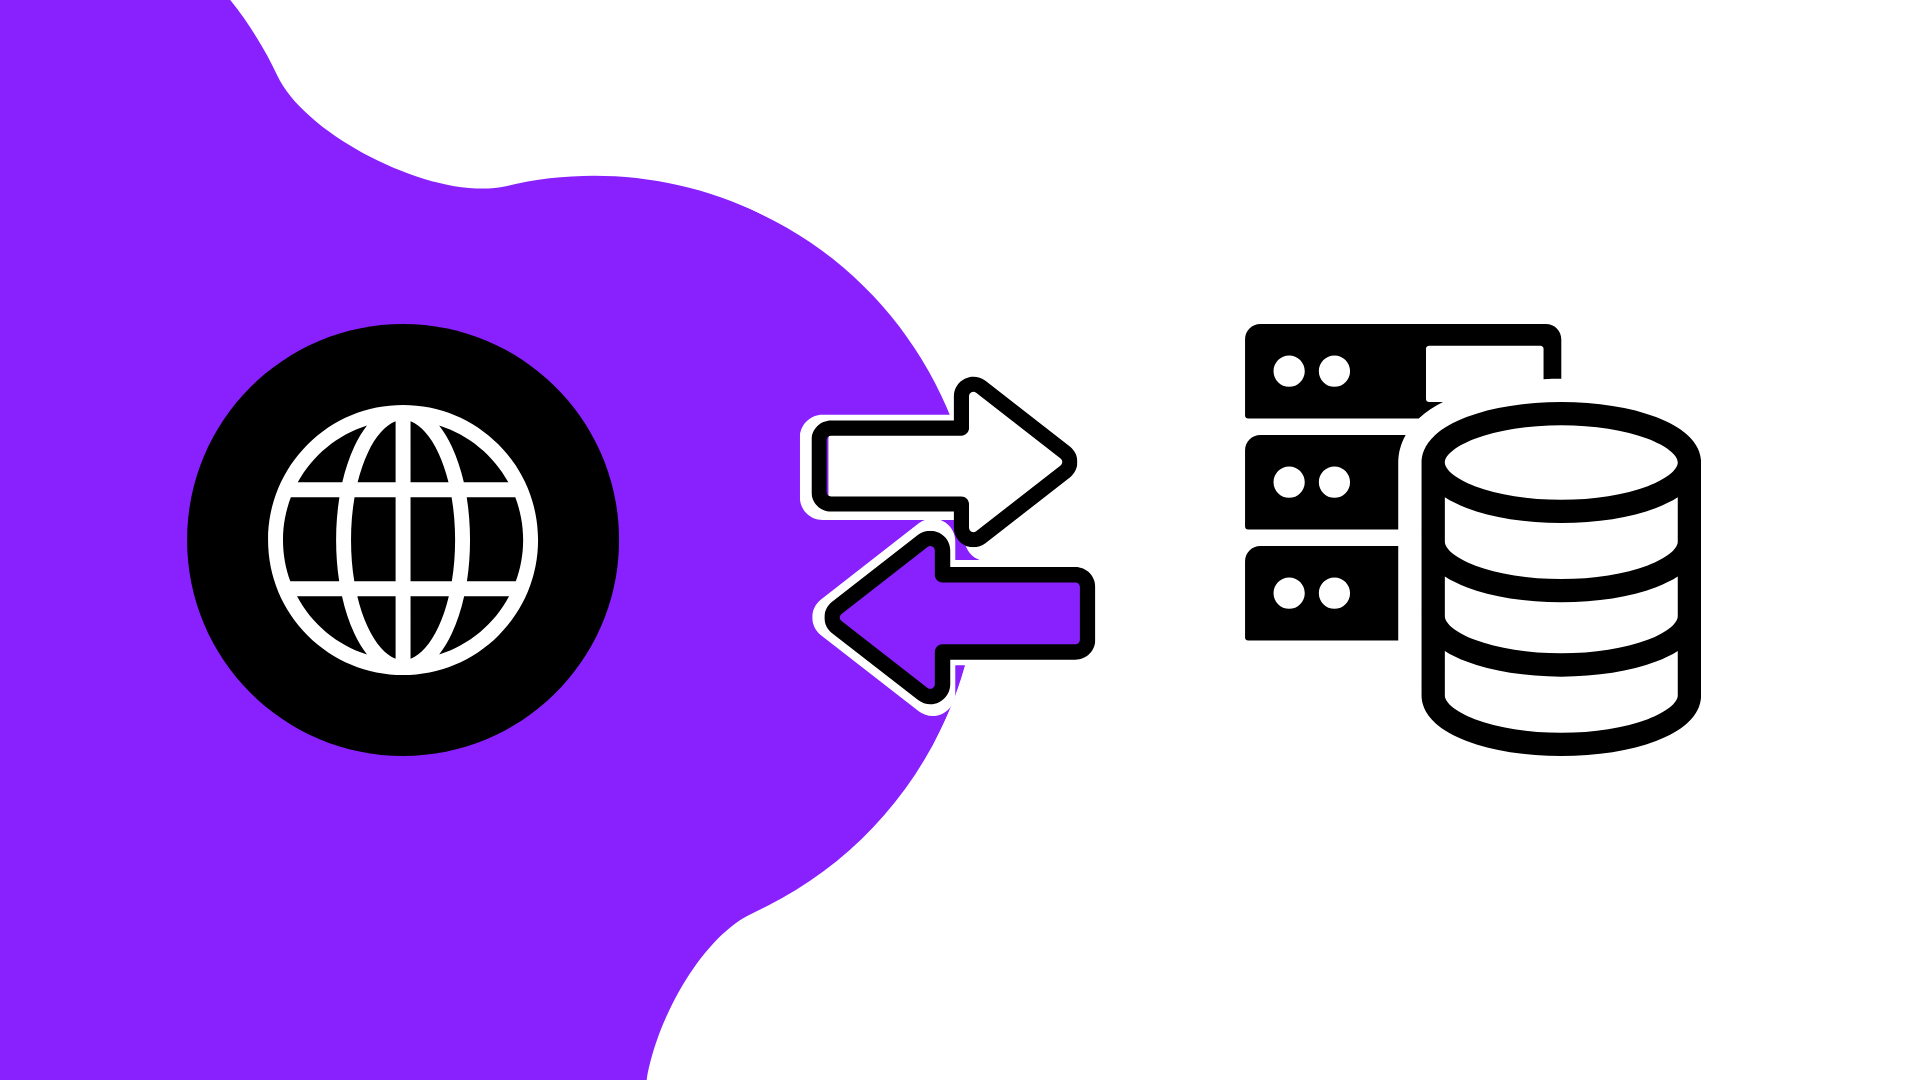
Recently, I became interested in web development. After rebuilding my website from scratch and dealing with JavaScript, I decided to take it to the next level by creating my own REST API with .NET Core and my best friend C#. For newcomers like me a few weeks ago, a REST API is a system that allows communication between different points via HTTP requests, a fast protocol that transports messages and translates them for these endpoints.
How Does a REST API Work?
It’s simple: the client, usually a browser, sends a request to a server that hosts the API using an access URL. The server handles that request, which the developer has previously created—in my case with .NET Core—and returns a response. This could be an error, a status, a resource, ...
As I mentioned, the developer enables all this. For example, you can have access to a database, which is quite common, or generic methods like the ones I currently have active in my API so they can work from this website.
What Have I Developed with the REST API?
I started testing simple things, like creating a SQLite database and connecting it to a controller— the system that handles your HTTP request and processes it to send a response back to the client. I also tried Swagger, a basic but very powerful tool included with .NET Core when creating a REST API project, which allows testing all possible requests in your system. The database part was cool but not enough for a real project like the next one.
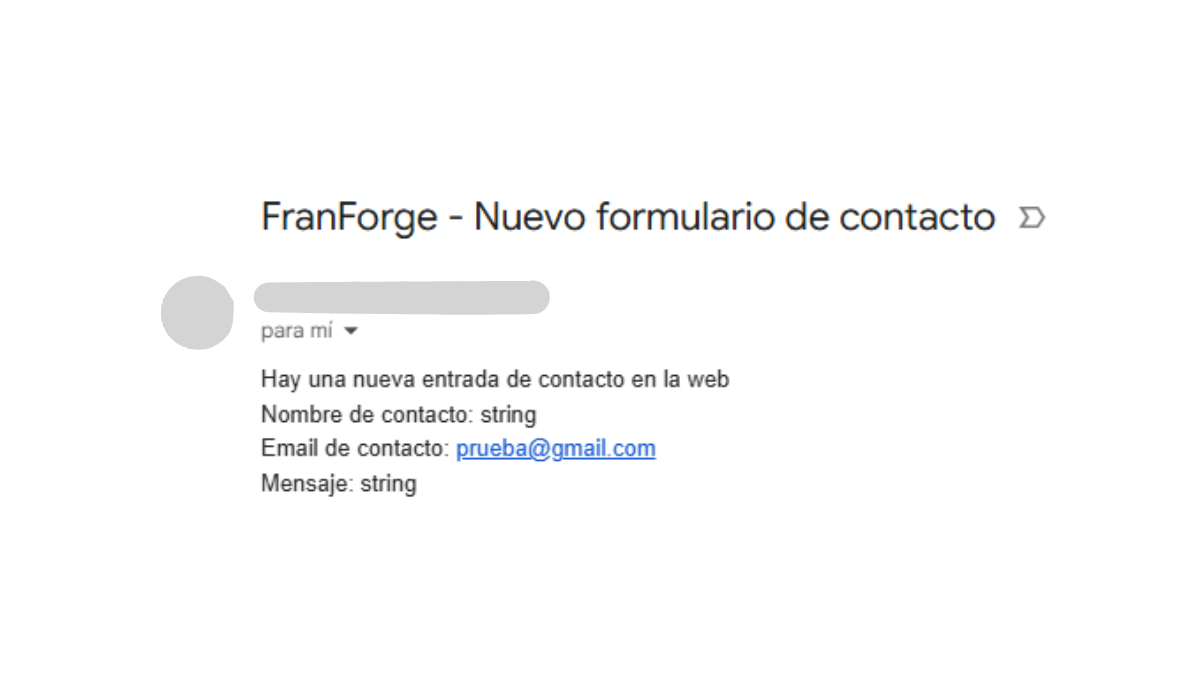
Currently on the website, there is a contact form that previously pointed to an external service. Since my site is hosted on Github Pages, a fast and free hosting service directly synced with Github and its repositories, it didn’t allow me to use SMTP mail services or similar. The easiest option was to point to another service. The problem was accessing that service—it was an extra step that I often forgot, which could result in missing notifications when someone contacted me through the site. My solution was to create the API to send myself an email and receive the notification on my phone—much simpler and more direct than using an external service. After a brief time learning and trying to implement it, the email-sending system worked, at least on localhost.
I decided to upload it to Render, a cloud hosting service for backend processing with both paid and free plans. The free plan has some limitations, like your system shutting down after a few minutes of inactivity until a new request reactivates it, which was perfect for me and something Github Pages didn’t allow. Everything seemed fine until I encountered two main problems: it had to be deployed with Docker or similar (I had no idea what Docker was), and SMTP services were blocked for security on Render and other providers. That’s when I decided to pivot to a pure HTTP system without SMTP.
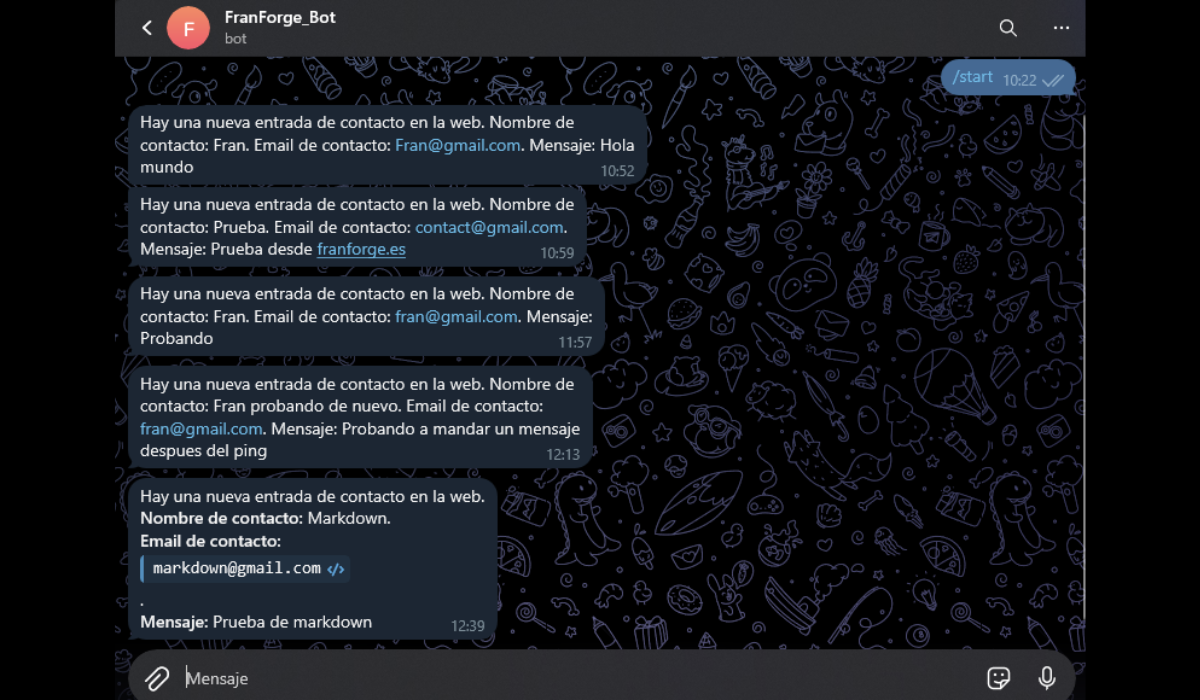
After checking which services allowed fast notifications to mobile or similar, I discovered that Telegram and Discord allow bots to integrate with APIs like this. I immediately went for Telegram to create a bot and connect it to my API.
Creating a Telegram Bot
Creating a Telegram bot is quite simple: you just need to go to @BotFather in the app—fun, to say the least— and run the command /start followed by /newbot. It will guide you through creating your bot and provide the API Token required to use it from your API. This code is private and should not be shared, so, like sending emails with my Google App Password, we store it in an environment variable only accessible to your OS when testing and your REST API.
Another necessary step to ensure the bot only sends messages to your Telegram chat and not to others is to start your bot with /start and get your chat ID via a route provided by Telegram to view a JSON with your bot’s information (https://api.telegram.org/bot"BOT_TOKEN"/getUpdates). Your chat ID will appear there.
Once we have both the bot token and chat ID, we add them as environment variables, and we can manage the bot from our REST API. The only thing left is to handle the request from our client—in my case, a form with JS to send data and display a visual response.
That’s how I created my personal REST API, and gradually, as I get to know it better, it will have more functionalities for the website, like a newsletter or other services.
Additional Advice with Render
As mentioned earlier, Render shuts down after a few minutes of inactivity on the free plan until it receives another request. This can slow down user experience, as submitting a form would require waiting for the API to wake up and process the request, delaying the visible JS response.
To solve this, on my website I use a JS method that, upon entering the site and every 5 minutes, sends a ping request to the server. If the server is off, this acts as a startup. This way, when submitting a form, the API is already active in most cases, so there’s no waiting.